Certificate Set Up Instructions
On this page we will explain how to install and set up SSL certificates
In the Jira, shared, folder , there is a file called CLIENTNAME.p12
You need to download this file and then install it to your system or browser.
The password for the certificate is: CLIENTNAME-edmondscommerce
The exact process varies between systems and browsers.
Chrome is the easiest one to do it so we suggest you try with that first
For Windows
1.Open Google Chrome. Open the menu at the top right corner and select Settings.
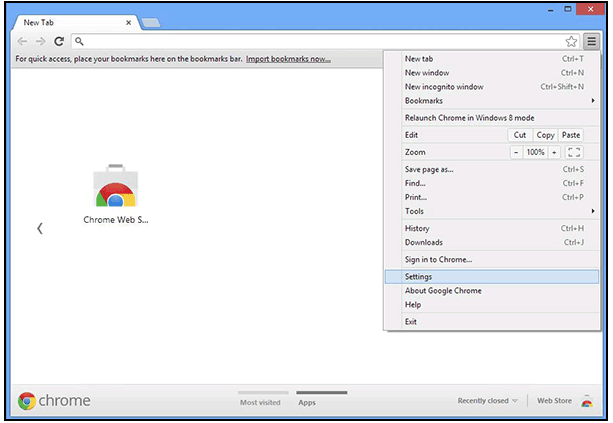
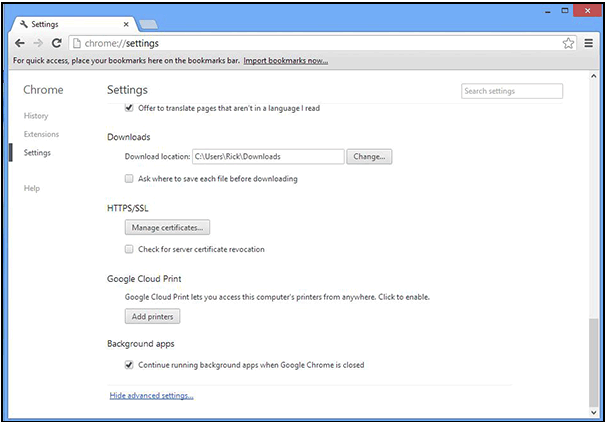
2.Type 'cert' into the Search Settings box in the top right and then press the [Manage Certificates] button.
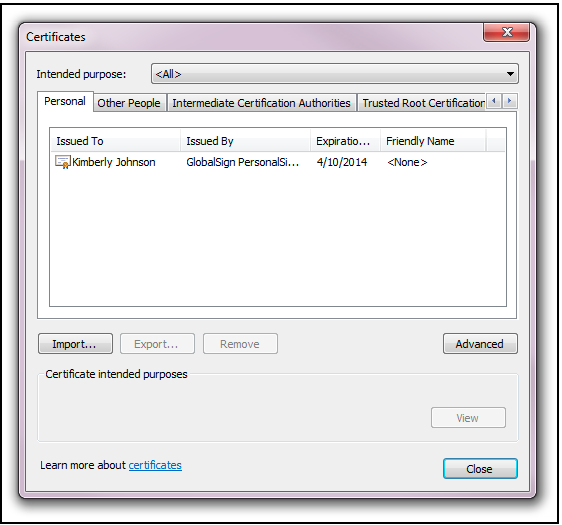
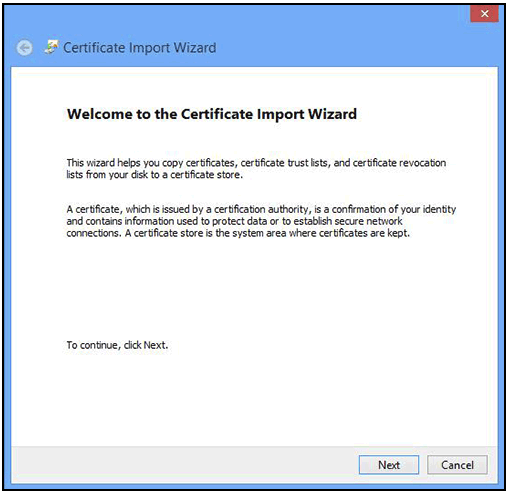
3.Click Import to start the Certificate Import Wizard.
4.Click next.
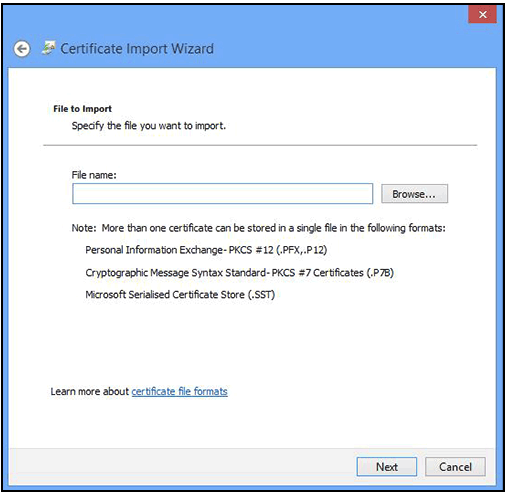
5.Browse to your downloaded certificate PFX file and click Next. Note: When browsing to your PFX file make sure the file type in the bottom-right of the browse window is changed to Personal Information Exchange, otherwise it will not find your file.
6.Enter the password you entered when you downloaded the certificate. We recommend you enable the second and third options listed. Click Next.

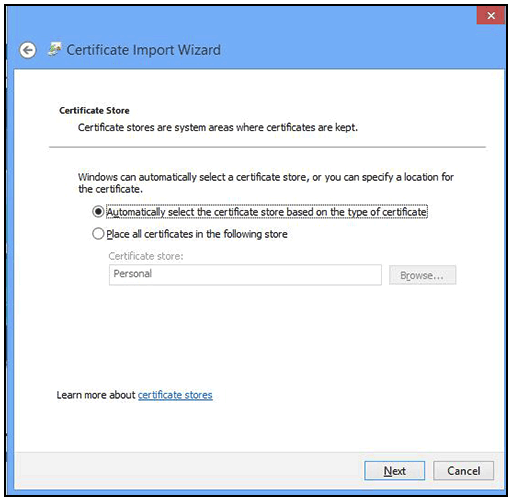
7.Let the Certificate Import Wizard determine the best place for the installation. Click Next. Note: In some instances the certificate may not install under Personal. If this is the case then manually select the second option when rerunning the installation.
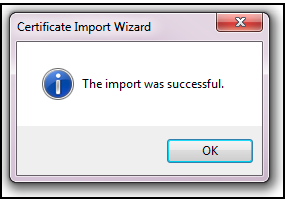
8.Click Next. Click Finish. 
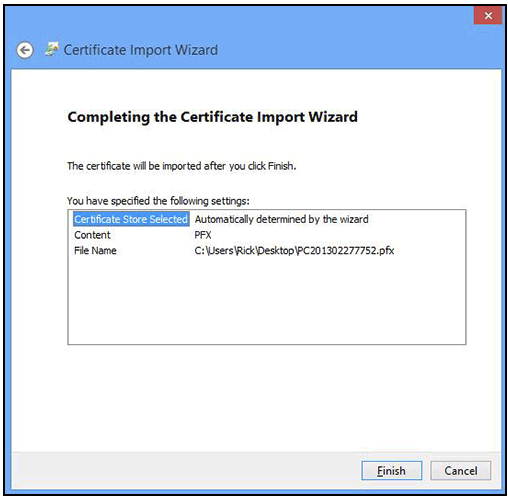
9.The certificate is now installed and can be used for network or secure client authentication.