Bitbucket
Adding a new Repository
- Log in to Bitbucket as the client
-
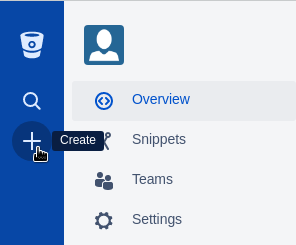
Click the Create button:
-
Choose "Repository"
- Enter the site name for "Repository name"
- Click "Create Repository"
- In the top-right, change HTTPS to Git

- Copy its value to the relevant Info Sharing ticket
Setting the main branch
This is the default branches all new branches should branch from. In our case, it should be LIVE
- Log in to Bitbucket as the client
- Choose Repositories from the left menu
- Choose the client's repository
- Click
 from the left menu
 - Under General > Repository Details
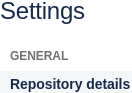
- Main Branch, choose LIVE:

Adding Edmonds Commerce as Admin
- Navigate to the repository on Bitbucket
- Click Settings on the left
- Click "User and Group access"
- Search for, and click "edmondscommerce" in the "Username or email address" box
- Change "Read" to "Admin"
- Click Add
Adding Bitbucket as a remote
Note
You'll need to add your SSH key to Bitbucket first
cd /path/to/repogit remote add bitbucket git@bitbucket.org:clientname/reponamegit push --all bitbucket
Adding your SSH key to Bitbucket
- Log in to Bitbucket as the client
- Click the user's avatar in the bottom left and click Bitbucket Settings
- Click "SSH Keys" under Security
- Click "Add key"
- Add the container's hostname into "Label" and the container's public SSH key
Adding OAuth for Jira
Note
This is used for Jira's Bitbucket integration
- Log into Bitbucket as the client
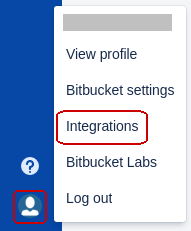
- Click the user's avatar in the bottom left and click Integrations
-
Click Integrations
-
Click OAuth (Under Access Management)
- Click "Add consumer"
- Fill in the form:
- Name: [Client Name] Jira
- Description: optional
- Callback URL: (the Jira URL)
- URL: optional
- This is a private consumer: ticked
- Permissions: Tick all the boxes
- Click Save Expand the newly created Consumer "ClientName Jira"
- Note down the Key and Secret in the Jira Info Sharing ticket
192.168.236.107
API
Calling endpoints
Need to ensure that there is an App password set up for the account, we can then set a user/password flag
curl -vvv --user username:password
Pull Requests
Create your pull request in BitBucket
Create a feature branch as normal. See the git page for more details about this
Work as normal on the branch, committing and pushing frequently until the feature is complete.
To do this you need to carry out the following steps
- Go to the repo in BitBucket
- Click on the
Brancheslink in the left hand menu - Find your branch in the list and click on it
Tip
If there are lots of branches consider deleting old ones
- Click the
Create pull requestlink - At the top of the page there will be two boxes. The first is the branch you have been working on, the second is the branch that you want to merge into. This will default to master, so update it to the correct branch
- This should populate the Title and Description with the branch name and a list of commits. Update this with any other relevant information
- Tick the
Close ${branch} after pull request is mergedbox. This will remove the branch from BitBucket and keep things tidy - Click the Create Pull Request button
Accept your pull request
At this point, you should glance over the pull request page to make sure there is nothing obviously wrong with the commits, and then click the merge button at the top of the page.
Update your local repo
cd /path/to/repo
BRANCH=(RELEASE|LIVE|other)
git checkout "${BRANCH}"
git pull bitbucket "${BRANCH}"
git push origin "${BRANCH}"
Await Feedback
At some point in the future someone will (should) review the pull request and leave comments on it. These should show up in slack (T.B.C.) and an email will be sent through to the projects inbox.
Reviewing a Pull Request
To review a pull request do the following
- Go to the repo on BitBucket
- Click on the
Pull requestslink in the left hand menu - Update the filter to
Merged - Click on the pull request that you want to review
At this point you will have a list of the files that were changed and a diff. At this point you can add a general comment at the top, or as you go through the diff leave a comment on a specific line.