Ansible Galaxy
What is Ansible Galaxy
One of the big advantages of using Ansible is that there is a wealth of pre created and often very high quality roles that can be brought in as dependencies to your Ansible project. The place where you can search and find these roles is Ansible Galaxy. Most of the roles (if not all) are actually hosted in Github.
Any role that is listed on the Ansible Galaxy website can then be installed using the ansible-galaxy command which is included with your standard Ansible install.
This means that you don't have to do everything from scratch. You can also create and share your own roles on Ansible Galaxy which means you can easily add them as dependencies to your own projects and also get that nice warm feeling that comes with sharing your work with the world
In summary:
-
Ansible Galaxy is an online repository of Ansible roles that can be brought in as dependencies to your Ansible project.
-
ansible-galaxyis a command line tool for working with Ansible Galaxy. It can install dependencies to your project and also assists in creating and managing new roles.
Documentation Links
The primary documentation is here:
http://docs.ansible.com/ansible/latest/galaxy.html
And you should also read this page:
https://galaxy.ansible.com/intro
ansible-galaxy CLI Tool
The CLI tool is what makes Ansible Galaxy so useful.
Here is the basic help from the command
joseph@joseph-thinkpad ansible-galaxy -h
Usage: ansible-galaxy [delete|import|info|init|install|list|login|remove|search|setup] [--help] [options] ...

Options:
  -h, --help            show this help message and exit
  -c, --ignore-certs    Ignore SSL certificate validation errors.
  -s API_SERVER, --server=API_SERVER
                        The API server destination
  -v, --verbose         verbose mode (-vvv for more, -vvvv to enable
                        connection debugging)
  --version             show program's version number and exit

 See 'ansible-galaxy <command> --help' for more information on a specific
command.
Authors of Note
Like any system of user contributed resources, some are much better than others
Here are some authors of note:
Geerlingguy
There are numerous authors on Galaxy, however one that clearly stands out as having a lot of downloads, a lot of packages and supporting a lot of distros is geerlingguy
https://galaxy.ansible.com/geerlingguy/
Has lots of roles that are relevant to our kinds of requirements. Seem well put together and very popular
Edmonds Commerce
Well of course, we're a bit biased, but our roles are the most relevant to our requirements
https://galaxy.ansible.com/edmondscommerce/
For Example, Creating an Akeneo Role
Here is a step by step guide to creating an Ansible role, based upon our Akeneo role
See our Akeneo for more information on Akeneo itself.
Init
To create a new role, we need to use the ansible-galaxy init command:
joseph@joseph-thinkpad ansible-galaxy init --help
Usage: ansible-galaxy init [options] role_name

Options:
  --container-enabled   Initialize the skeleton role with default contents for
                        a Container Enabled role.
  -f, --force           Force overwriting an existing role
  -h, --help            show this help message and exit
  -c, --ignore-certs    Ignore SSL certificate validation errors.
  --init-path=INIT_PATH
                        The path in which the skeleton role will be created.
                        The default is the current working directory.
  --offline             Don't query the galaxy API when creating roles
  --role-skeleton=ROLE_SKELETON
                        The path to a role skeleton that the new role should
                        be based upon.
  -s API_SERVER, --server=API_SERVER
                        The API server destination
  -v, --verbose         verbose mode (-vvv for more, -vvvv to enable
                        connection debugging)
  --version             show program's version number and exit

 See 'ansible-galaxy <command> --help' for more information on a specific
command.
By default, init will create the role in the current directory. If you are in the project root and want to create it in the roles directory then use --init-path=roles
Your role name will end up in the format edmondscommerce.role-name so we may as well start like that:
#cd into the ansible project root
cd ansible-project

#create roles directory if it doesn't already exist
mkdir -p roles

#init the role
ansible-galaxy init --init-path=roles edmondscommerce.akeneo
And you will see something like:
joseph@joseph-thinkpad ansible-galaxy init --init-path=roles edmondscommerce.akeneo
- edmondscommerce.akeneo was created successfully
And this has created:
joseph@joseph-thinkpad tree roles/edmondscommerce.akeneo/
roles/edmondscommerce.akeneo/
├── defaults
│   └── main.yml
├── files
├── handlers
│   └── main.yml
├── meta
│   └── main.yml
├── README.md
├── tasks
│   └── main.yml
├── templates
├── tests
│   ├── inventory
│   └── test.yml
└── vars
    └── main.yml
As you can see, this creates a selection of files and folder. Some of these files will need to be removed, others will need to be edited.
Ones that you will definitely keep and edit are:
README.md- this needs to be edited to properly reflect the rolemeta/main.yml- this one is required by Ansible Galaxy
The other folders and files are optional, however we will keep them until we are sure we don't need them.
README.md
The README file is, as you would expect, the first page of documentation for the role.
It is what will be displayed on the home page on Github and also on the README page in Ansible Galaxy.
The default file has preset headings which are good and should simply be filled out with content.
You should add a link back to Edmonds Commerce for a tiny bit of SEO/Marketing benefit
meta/main.yml
This file is required by Ansible Galaxy itself
The file is well commented and so filling it out is quite straight forwards.
Be aware that changes to the Ansible Galaxy works means that you have to add in the role_name to allow the role to have a sensible name
Here is our Akeneo file:
galaxy_info:
  author: edmondscommerce
  description: A role to install all Akeneo dependencies and then the platform itself
  company: Edmonds Commerce
  license: MIT
  min_ansible_version: 2.0
  # You need to manually add this node
  role_name: akeneo

  # platforms is a list of platforms, and each platform has a name and a list of versions.
  #
  # platforms:
  # - name: Fedora
  #   versions:
  #   - all
  #   - 25
  # - name: SomePlatform
  #   versions:
  #   - all
  #   - 1.0
  #   - 7
  #   - 99.99
  platforms:
  - name: Centos
    versions:
      - 7

  galaxy_tags:
    - akeneo
    - php
    - pim
    - magento
    # List tags for your role here, one per line. A tag is a keyword that describes
    # and categorizes the role. Users find roles by searching for tags. Be sure to
    # remove the '[]' above, if you add tags to this list.
    #
    # NOTE: A tag is limited to a single word comprised of alphanumeric characters.
    #       Maximum 20 tags per role.

dependencies: []
  # List your role dependencies here, one per line. Be sure to remove the '[]' above,
  # if you add dependencies to this list.
Create Github Repo
Our next step is to create a repo on Github and then push this role into it
First, sign into Github and hit the + icon in the top right and select "create new repository"
The repository name should be in the format ansible-role-rolename, so for Akeneo it will be ansible-role-akeneo
Note
If you have not added in the role_name in the meta/main.yml file then the role will have the same name as the repo.
We want to prefix it with ansible-role to make it abundantly clear what it is.
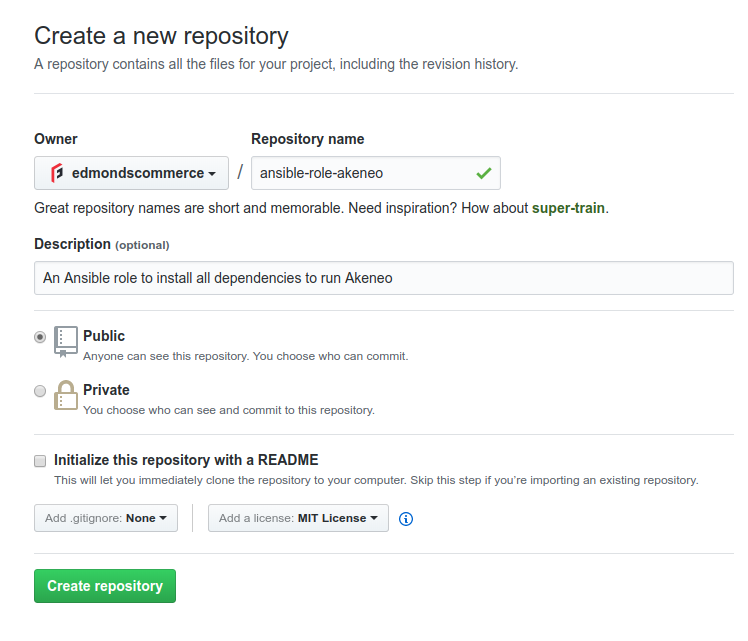
Then click to create the repo.
Add Github Remote
Now we need to connect your local repo up to the Github repo so that you can push changes
Update .gitignore
First of all, we need to make sure that the contents of your roles directory is not tracked by git.
For that purpose in your main ansible project folder, we need to add the following to your .gitignore file:
roles/*
For example:
cd ansible-project
echo 'roles/*' >> .gitignore
Note
If you do want to track a role in this folder, you can add an exclusion to your .gitignore file such as
!roles/my-custom-role
Init Git Repo on Role and Add Remote
Now we need to intialise a git repository in our new role and then add github as a remote
# cd into the role folder
cd ansible-role/roles/edmondscommerce.akeneo

# init as a git repo
git init .

# add all contents of role to git
git add -A

# create initial commit
git commit -m 'Initial commit'

# add the github remote - Update this line the URL of your new repository
git remote add github git@github.com:edmondscommerce/ansible-role-my-repository.git

# push the commit up to github, using force
git push github master --force
Warning
Notice the user of --force on the git push.
This is one of the very few times a force push is appropriate.
Once this has completed, then if you visit the Github page, for example https://github.com/edmondscommerce/ansible-role-akeneo, then you will see the contents of your repo and also the contents of your README.md file displayed on the repo home page.
Add Other Role Dependencies
For our Akeneo role, we are not going to create everything from scratch. Instead, we are going to bring in other roles as dependencies
This is quite straight forwards and involves
- Updating the
meta/main.ymlfile
Importing to Ansible Galaxy
Make sure you are logged in to Github and then go to:
https://galaxy.ansible.com/login
Then go to My Content and press the blue Add Content button
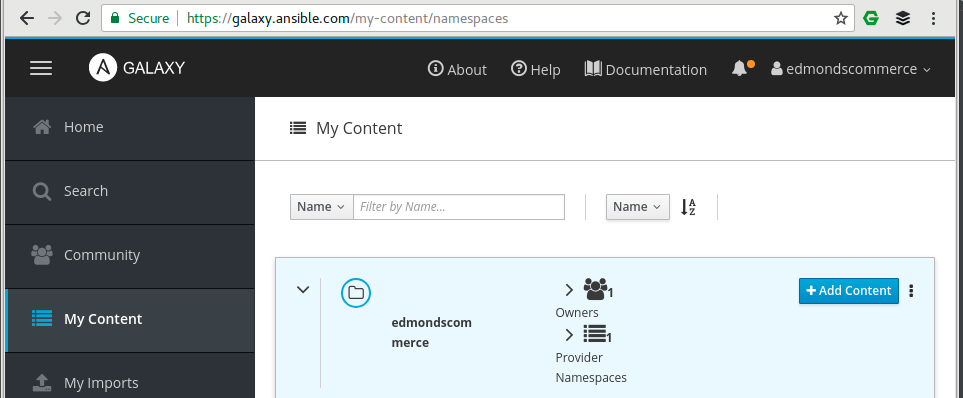
Find the github repo you created previously and press import
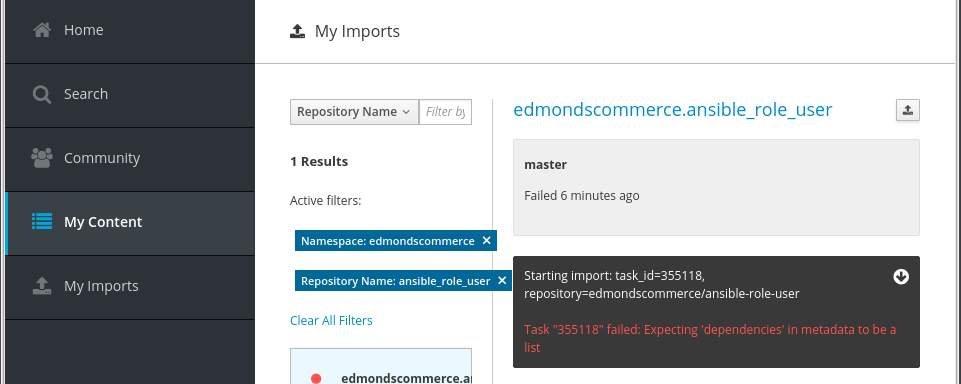
You will get a new line in the content section. The status column will have a green or red entry. You can click on this to se the details
!!! Note: Click the Red Message to See Details You can click the red message to see the import details, including details of any errors
Ansible Galaxy Meta
Here is an example Galaxy meta file
This should live in your role as meta/main.yml
# The `galaxy_info` and `dependencies` top level elements need to be updated as required

galaxy_info:

  ######################################
  # Things you need to set:

  #The role name, without the edmondscommerce bit:
  role_name: user
  description: A role to create and configure Linux users the way we want
  galaxy_tags:
    - linux
    - user
    - bashrc
    - vimrc
    - sudo
    # List tags for your role here, one per line. A tag is a keyword that describes
    # and categorizes the role. Users find roles by searching for tags. Be sure to
    # remove the '[]' above, if you add tags to this list.
    #
    # NOTE: A tag is limited to a single word comprised of alphanumeric characters.
    #       Maximum 20 tags per role.


  ######################################
  # Below you can probably leave as this

  author: Edmonds Commerce
  company: Edmonds Commerce

  # If the issue tracker for your role is not on github, uncomment the
  # next line and provide a value
  # issue_tracker_url: http://example.com/issue/tracker

  # Some suggested licenses:
  # - BSD (default)
  # - MIT
  # - GPLv2
  # - GPLv3
  # - Apache
  # - CC-BY
  license: Apache

  min_ansible_version: 2.0

  # If this a Container Enabled role, provide the minimum Ansible Container version.
  # min_ansible_container_version:

  # Optionally specify the branch Galaxy will use when accessing the GitHub
  # repo for this role. During role install, if no tags are available,
  # Galaxy will use this branch. During import Galaxy will access files on
  # this branch. If Travis integration is configured, only notifications for this
  # branch will be accepted. Otherwise, in all cases, the repo's default branch
  # (usually master) will be used.
  #github_branch:

  #
  # platforms is a list of platforms, and each platform has a name and a list of versions.
  #
  # platforms:
  # - name: Fedora
  #   versions:
  #   - all
  #   - 25
  # - name: SomePlatform
  #   versions:
  #   - all
  #   - 1.0
  #   - 7
  #   - 99.99
  platforms:
    - name: EL
      versions:
        - 7

######################################
# Don't forget to add any dependencies

dependencies:
  []
  # List your role dependencies here, one per line. Be sure to remove the '[]' above,
  # if you add dependencies to this list.